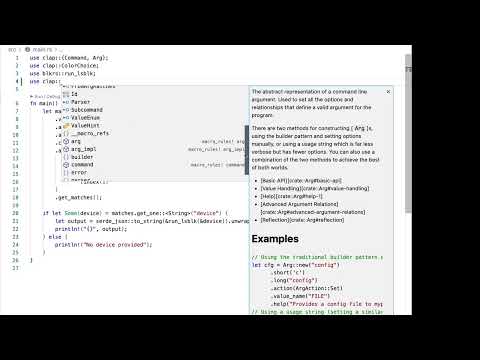
Videos · Rust Fundamentals Applied Program · Week 1
Visual Studio Code setup and workspace navigation for Rust
Visual Studio Code provides a free, cross-platform environment for Rust development, featuring file management, extension support, and integrated debugging tools. The video covers navigating the workspace, managing temporary tabs, and using the command palette to configure the editor.
Transcript
Although you have, of course, the capability of using almost any text editor, I would say, that supports Rust, we are going to be concentrating in using Visual Studio Code. Most, if not all, of the examples we'll be using this one text editor. It's very convenient. It's free. It's available pretty much on every operating system out there, and it's very well supported.
So all of the tooling that we have that I'm going to be using throughout this course will be using Visual Studio Code. Here you can see that it's automatically detecting that I'm using a Mac computer, but definitely you'll have some other options for Linux, Windows, as well as Apple computers, which is pretty useful if you want a little bit more flexibility. The installation sources will change, but you will get the same environment. So all of the examples and all of the extensions. And all of the configuration that we're going to see are going to work regardless.
So that is Visual Studio Code. Let's dive in to Visual Studio Code to see some of the components. So I've launched Visual Studio Code, and this is kind of like what you will be looking at if you just launched from a location. Now, let's talk a little bit about what we're seeing here and how we're going to be working. If you've never used Visual Studio Code, this will be a very quick.
Walkthrough and a refresher for some of the things that are specific to how we're going to be using Rust. So I have some code here. This is a CLI example that I have in Rust. The contents are not important, except for the fact that this is called the Explorer. Now, this is where all of the files are.
And in here, the workspace will contain usually the files. This is the welcome page. You can see here at the very bottom, we'll have that option enabled. And we have this show welcome page on startup. If you uncheck these next time, they won't show it up.
Now, you can have different options here. You have a quick overview of what you have, and you get these very useful walkthroughs. If you've never used Visual Studio Code, I highly recommend you take a look at these and go and play around with those. Now, for things like what we're trying to do here, probably starting with Jupyter Notebooks might not be. That useful, but still worth going through the fundamentals and getting started with Visual Studio Code.
All right, so I'm going to close these and all like as soon as I do that, this goes blank. I still have the example. So anytime you want to get rid of these panels, you can just click the actual icon that produces it. So in this case, if I click that, it goes away. If I want to explore, it brings the files back.
So if I click any of these files, like, say, for example, the readme, I will get the readme loaded. Here, notice how it is in italics. That is because it's temporary. That means that if I open the license, it will be replaced. If I open readme again, it gets replaced.
If I want that to be sticky, I double click and then it's no longer in italics. It's not temporary. And if I open license, it will open as a new tab. So something useful to remember if you're perhaps getting frustrated that things are getting replaced. Well, now, you know.
So there you go. That's a license. This is a readme. This is a readme. So pretty straightforward.
Now, you also have the ability to look for files. We're not going to be using many, many different files, but definitely have the ability to search. It comes with source controls. If you have installed Git in your system, I highly recommend that you have Git installed and pre-installed and ready to go. It is something that we're not going to cover, but you should probably see a way to have that pre-installed.
Run and debug will be a way that we'll go into details later on how to do this, but we'll be able to run Rust applications and debug them, and you will have to create a custom launch that JSON file. We'll go into the details later on how to do that. But it is essentially instructions for the text editor for this project on how to run this application and get into debug mode. Next and where I want to focus next is on extensions. Extensions is where you are going to have everything available to you.
So that you can actually go ahead and make use of things that are going to enhance the experience with the text editor. We will see a few of the things that we can install, but you can see right now that I have plenty of things installed. I have like 53, but say, for example, if I was looking for, well, I don't want to install any of the recommended ones. But if I was looking for something like, let's check, for example, if there's anything for licenses. There's one for choose a license, license injector.
So when you're searching for things, you will get a list like this, and let's just pick this one to see what this is about. If I click here, you will get this menu, which is basically the same contents as the extension marketplace. There is a marketplace for extensions that is just a website where you will see all of the extensions available indexed for Visual Studio code. You can get some information. So in this case, you will see like the change log, some of the details, some of the publishing information, perhaps a little bit of documentation and how the usage would work.
So that is here with the extensions, and that's what you would get. So I'm going to close this one. And then what ends up happening is that you will start getting more icons here that are available to you, the more extensions you install. So I have. I have several different things, like including Azure, GitHub.
There's several different things that would allow me, like even Remote Explorer, that will allow me to open up those options and will definitely take a look at those. For the things that we're going to be working with, we're probably not going to be using much of these. But definitely extensions, run and debug, the source control, if I click this one, all of your changes will appear here. If I modify them, it immediately appears that. You can also make your commit and changes if you want to do them.
If you want to do them on the terminal, for example, is not a problem. But if you wanted to do something like with the text editor, this is where things would happen. So I'm going to undo these and save again so that this goes away. And there you go. So the other thing I want to show you is the command bullet.
Sometimes we will be using and changing things on the fly or interacting with certain extensions in my system. I will use command shift P and that will give me the command. This is known as the command bullet. So if I want to change things or interact with different extensions, this is where this would happen. You would also you also have the I think in our systems is control shift P and that it definitely changed from one system to the other.
But you can go to the menu of your application and you won't see it because it's it's all the way up. Here. But you can go to the view or menu bar and if I do that, you will see that command bullet opens up here and the keyboard shortcut shows here is very small, but it's shift command P and in our systems might be something different. But there you go. That is how you would call that special menu and start interacting and definitely you can change settings on the fly.
So that's a very quick overview of Visual Studio code, what it is and getting installed and some of the features. the important sections that we'll be using for this course.
A new free tutorial every two weeks
Short, practical videos on AI and programming, straight to your inbox. Unsubscribe anytime.